Before we continue, a little background reading. Below are descriptions on blending modes we are going to use.
Source: Wikipedia
Polarizer
Is a device that converts an unpolarized or mixed-polarization beam of electromagnetic waves (e.g., light) into a beam with a single polarization state (usually, a single linear polarization). Polarizers are used in many optical techniques and instruments, and polarizing filters find applications in photography and liquid crystal display technology.
Source: Photoshop Help
Hard Light
Multiplies or screens the colors, depending on the blend color. The effect is similar to shining a harsh spotlight on the image. If the blend color (light source) is lighter than 50% gray, the image is lightened, as if it were screened. This is useful for adding highlights to an image. If the blend color is darker than 50% gray, the image is darkened, as if it were multiplied. This is useful for adding shadows to an image. Painting with pure black or white results in pure black or white.
Vivid Light
Burns or dodges the colors by increasing or decreasing the contrast, depending on the blend color. If the blend color (light source) is lighter than 50% gray, the image is lightened by decreasing the contrast. If the blend color is darker than 50% gray, the image is darkened by increasing the contrast.
Multiply
Looks at the color information in each channel and multiplies the base color by the blend color. The result color is always a darker color. Multiplying any color with black produces black. Multiplying any color with white leaves the color unchanged. When you’re painting with a color other than black or white, successive strokes with a painting tool produce progressively darker colors. The effect is similar to drawing on the image with multiple marking pens.
Got it? ......right. Leave the mumbo jumbo to the anal geeks. We, the real creative people just blunder our way and love the element of surprise.:)
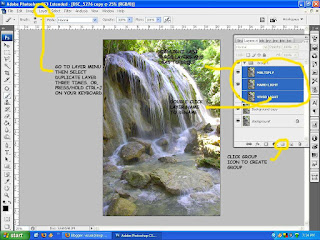
To start, open the document (Please ask permission if you can download bomick's photo to follow my tutorial.) As usual duplicate background layer first by press/hold Ctrl+J on your keyboard. We will go through each blending modes mentioned above in this order, 1) Hard light 2) Vivid light 3) Multiply.
Let us take time to study the various blending modes we are going to employ. (Click on a picture to enlarge and see how to change blending modes.)
Let us try Hard Light first.
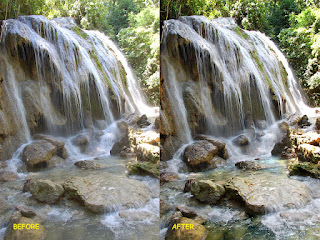
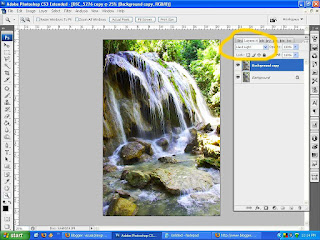 Oooh. The water is more clearer removing the glare/reflection present in the original. The rocks look wetter! But we do have overblown highlights on the water and the background tree leaves. We'll keep that in mind.
How about Vivid light.
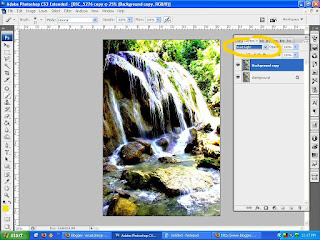 I like it even better. You can basically see the bottom of the stream. Hmmm. Again, it overblown the highlights and made the shadows more darker.
Let's try Multiply.
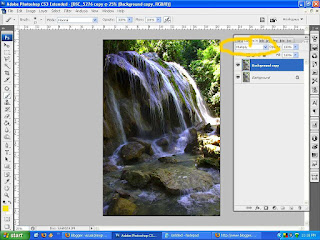 We have now more contrast on the tree leaves and a more defined waterfall near the trees but made the rest of our image darker.
(Photography Tip: You might want to stop down your exposure compensation value in this kind of scenario. It is easier to salvage detail of an image stopped down than over exposed highlights.)
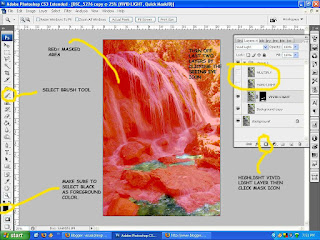
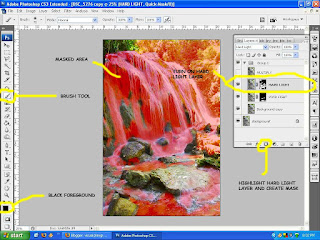
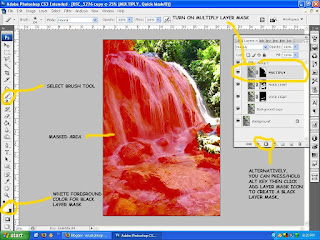
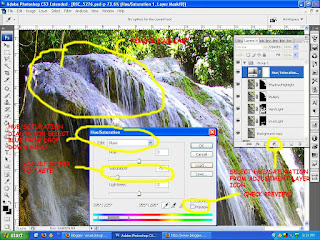
What we are going to do is use a selective masking. We will pick some bits and pieces from each of the blend modes to achieve our goal.
Let's roll up our sleeves and have some fun!
This is how we do it.
No comments:
Post a Comment