This is the second installment of my two-part series tutorial of "Making a Perfect Photo". On the first part, we made adjustments on the background, stretching it to give eyesight room and popping the subject out.
Today, we will be making subtle retouching on the subject to make the perfect bride photo.
Duplicate your background layer if you have just started on this tutorial. For the people who have been following the series from the beginning, make a new group by clicking the "Create a New Group" icon located at the lower part of the layers pallet. Rename the new group "Retouch".
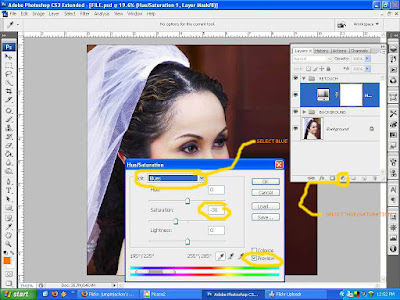
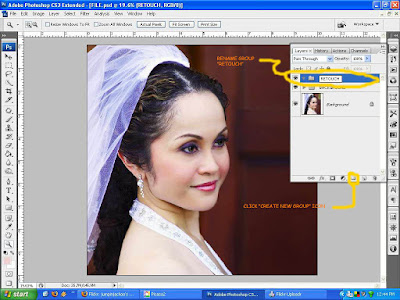 We'll start on removing the blue cast on the veil. Select "Hue/Saturation" from the "Create New Fill or Adjustment Layer". On the Hue/Saturation dialog box "Edit" option, click the drop down menu and choose blue. Lower the "Saturation" by dragging the slider to the left or directly input -30 on the saturation value box.
 Since the adjustment affected the whole image, we will apply masking. Adjustment layers via the layers pallet automatically add layer mask thumbnail. All we have to do is use the brush tool and make sure the foreground color is black. Carefully brush the veil and adjust brush size and opacity as you go near the edges.
 With the layer mask thumbnail selected, Press/Hold Ctrl+I to invert the masking. Got ya! :)
Select "Levels" from the New Adjustment Layer icon and change the midtone value to 1.28 or as desired. Pay attention to the shadowed eye part while changing values and then press "Ok" button.
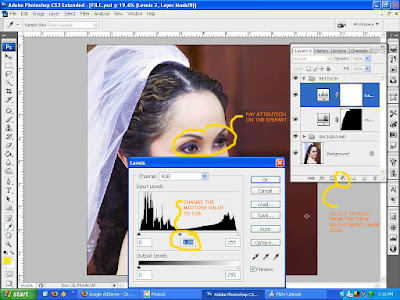 Activate the levels layer mask thumbnail by clicking it and then press Ctrl+I on your keyboard to invert from white to black. Choose a white foreground color and carefully brush the areas indicated below. Lessen the opacity and brush size as you go near the lighter part of the shadowed areas.
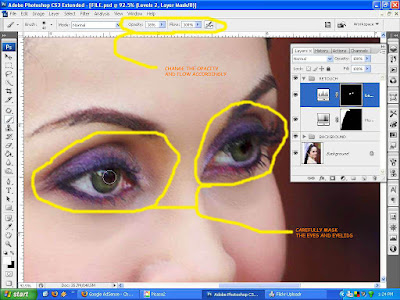 Create new layer and rename it "Shadows" so you can track your edits. With the brush tool selected, change the brush mode to "Luminosity" and set opacity to 3%. Select your source by Press/Hold Alt key and click the lighter area where you intend to lighten the shadows. Don't overdo the lightening, if you do your image will look dull and flat. Remember shadows are the ones defining the contours making an image three dimensional.
 As I have indicated on the first tutorial, there overexposure on the highlights most specially the foreground shoulder and the gown strap. Do the following steps I provided below.
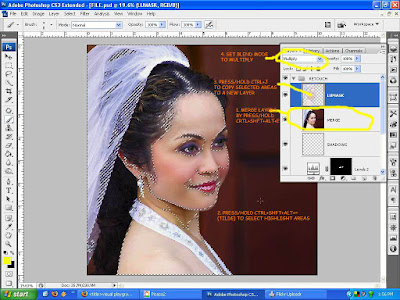
 Bring out the highlights of the hairs near the nape by using "Shadow/Highlights" from the Image menu>Adjustments options. Change shadow amount as indicated below.
 Mask the surroundings to reveal only the areas we intend to be affected.
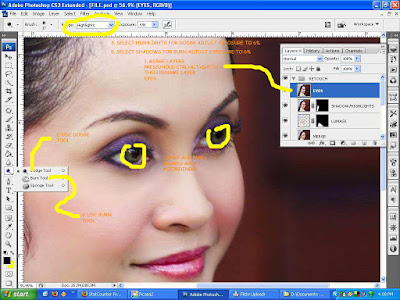
 A light touch of dodge and burn can make the eyes more sultry and captivating.
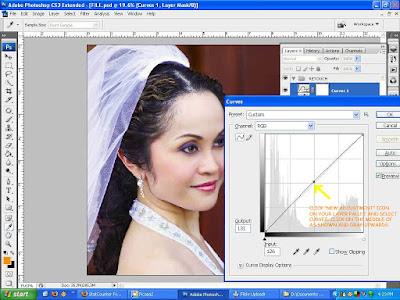
 Hang on we're almost there. Bump up the contrast by tweaking with curves. Select curves from the "New Adjustment Layer" icon from the layers pallet and drag the diagonal line a tad upwards.
 Now for the last part, choose crop tool and change the values of width and height with 8" & 10" respectively. I like the 4x5 ratio so it is really a personal preference. You can sized to your taste.
 Drag the window selection as shown and move as desired.
 Congratulations! We are done!
 Ciao!
Ciao!
No comments:
Post a Comment