From your monitor what do you observed? What can you do to improve the photo? How would you compose if you were the one who took the photo?
There is nothing wrong with this picture, but we can recompose to give it a dynamic appeal. How are we going to do that? Photoshop! Of course there are lots of photo editing softwares out there but I prefer Photoshop CS3. You can download a 30 day trial here. You can also download Paint.net, it's supposed to be good (I have not tried it) but what the heck it's free! To follow this tutorial, you should have Photoshop or other equivalent software that support photoshop actions, Rule of Thirds Cropping Photoshop Action from PanosFX (you will find download and installation instructions on their site), and of course a sample photo. You can use any photo you have. Ok let's roll up our sleeves and get started.
What is the "Rule of Thirds"?
According to Wikipedia:
"The rule of thirds is a compositional rule of thumb in photography and other visual arts such as painting and design.[1] The rule states that an image can be divided into nine equal parts by two equally-spaced horizontal lines and two equally-spaced vertical lines. The four points formed by the intersections of these lines can be used to align features in the photograph. Proponents of this technique claim that aligning a photograph with these points creates more tension, energy and interest in the photo than simply centering the feature would."

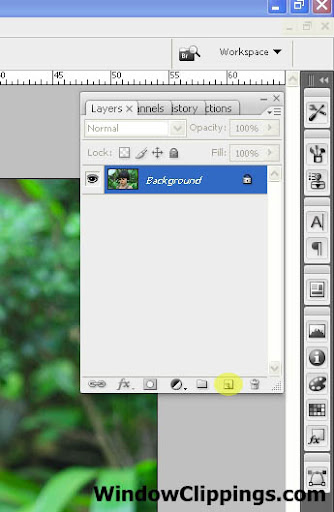
There you are. We will recompose our image to give it tension, energy and interest by using the rule of thirds! We can begin by opening our photo in photoshop. A brief friendly reminder..... DUPLICATE YOUR BACKGROUND LAYER BEFORE EDITING. You can do this by dragging the background layer to the "create new layer" on your layer pallet or press "Ctrl+J" on your keyboard. It is imporant that you duplicate your background layer, if you made a mistake your original will be lost forever. Make this a habit.
Ok. Now we will divide our photo into nine equal parts by two equally-spaced horizontal lines and two equally-spaced vertical lines. Don't worry you don't have to do this part, this is only for the purpose of discussion.
Obviously, our subject is too centered, a distracting white leaf on the upper left corner and too much activity on the background. These flaws draw our eyes out of our subject which is not good. We want the subject to standout leaving the background,well, a background.

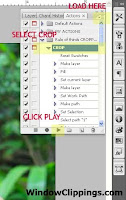
Select actions from the layers pallet or alternatively press Alt+F9 on your keyboard. If you have not load the action you can click on the arrow down button on the upper right of the action pallet and select load. Browse over the folder where you save it, select and press ok. It will now load on your action pallet. Select the crop action and press play button.
The crop action will now execute and wait for a dialog box to appear. Read the instructions and press continue.
I hope this tutorial have been helpful to you. My next tutorial will be to make the subject pop up more to isolate him from the background and a little retouching. See you later!
Part II
